Episode Tutorial (The App)

The Episode app can be downloaded from the App Store on IOS devices and Google Play on Android and Chrome OS devices

Navigating the App
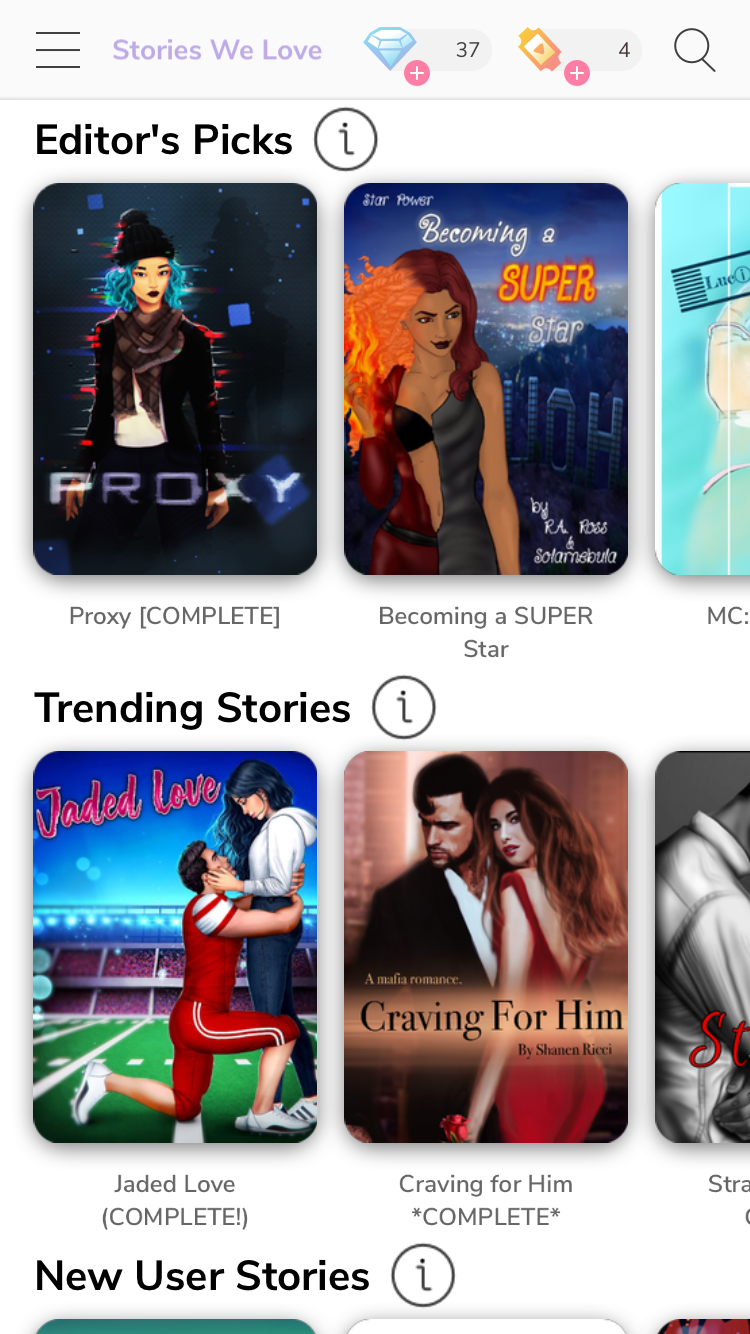
When you open the app, the first screen you’ll encounter will have headings with the story covers underneath, these are called shelves. The shelves on the home screen mostly include featured stories, which are stories that have been created or endorsed by Episode - the exception to this being the ‘My Favourites’ shelf. To view more of the stories on the shelf, swipe left. You can also search for specific stories using the magnifying glass in the top right hand corner of the home screen

To read stories written by community authors, click the three lines in the top left hand corner of the home screen, this will pull up a side menu which is how you access the other shelves as well as your profile. Directly underneath the profile tab is the current writer’s contest tab, which is where the winning stories from that contest will be displayed.


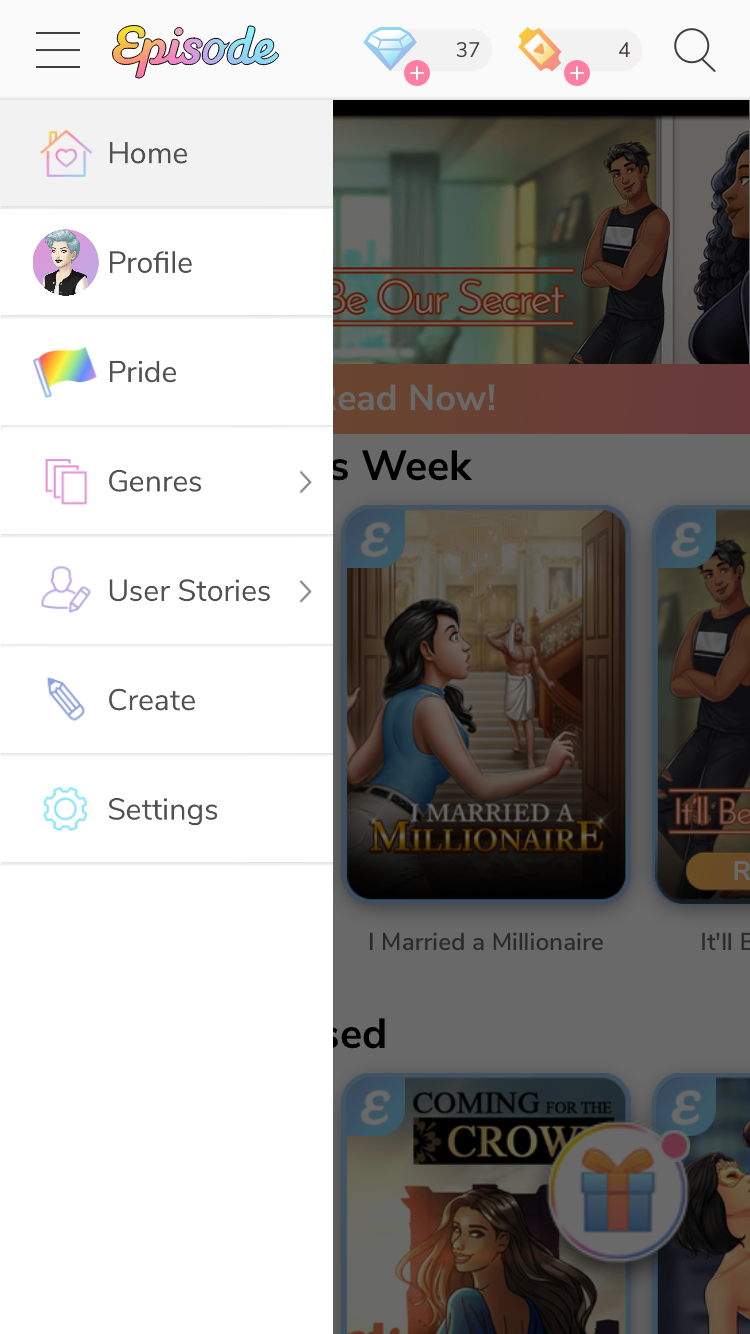
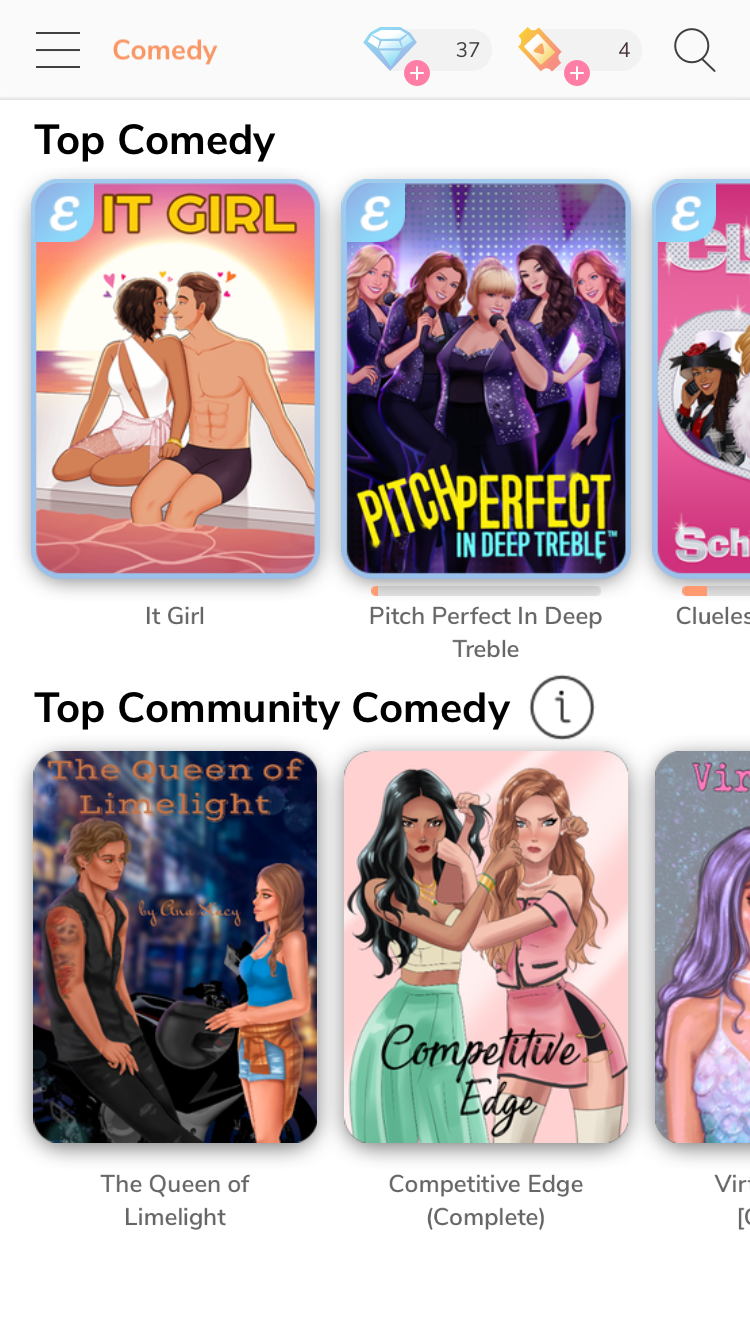
When the Genres tab is clicked, it activates a pull down menu which shows the different genres Episode stories are published under. Pressing one of the option allows you to browse all stories released in that genre

Here is what the screen will look like when a genre is selected (I chose to use Comedy)


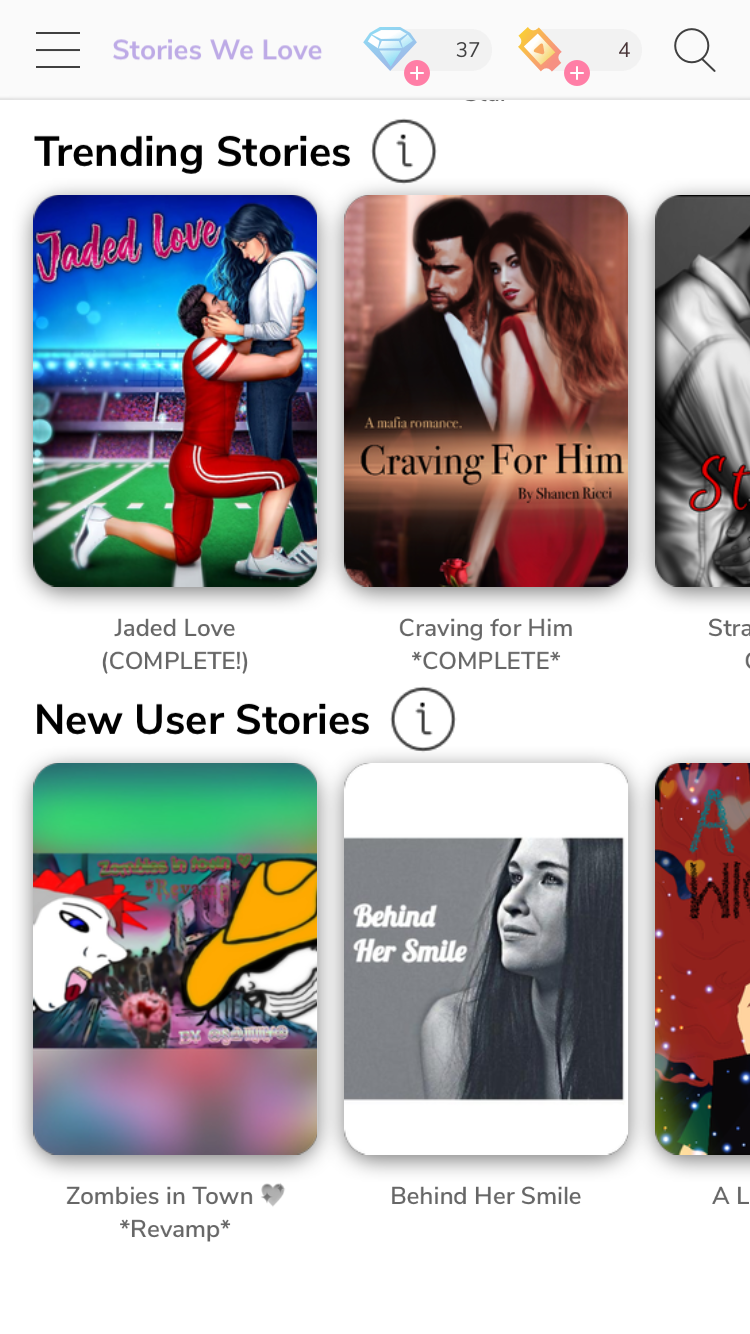
The User Stories tab activates a pull down menu with two options, Stories We Love - which has the Editor’s Picks and Trending Stories shelves


It also has the New User Stories shelf


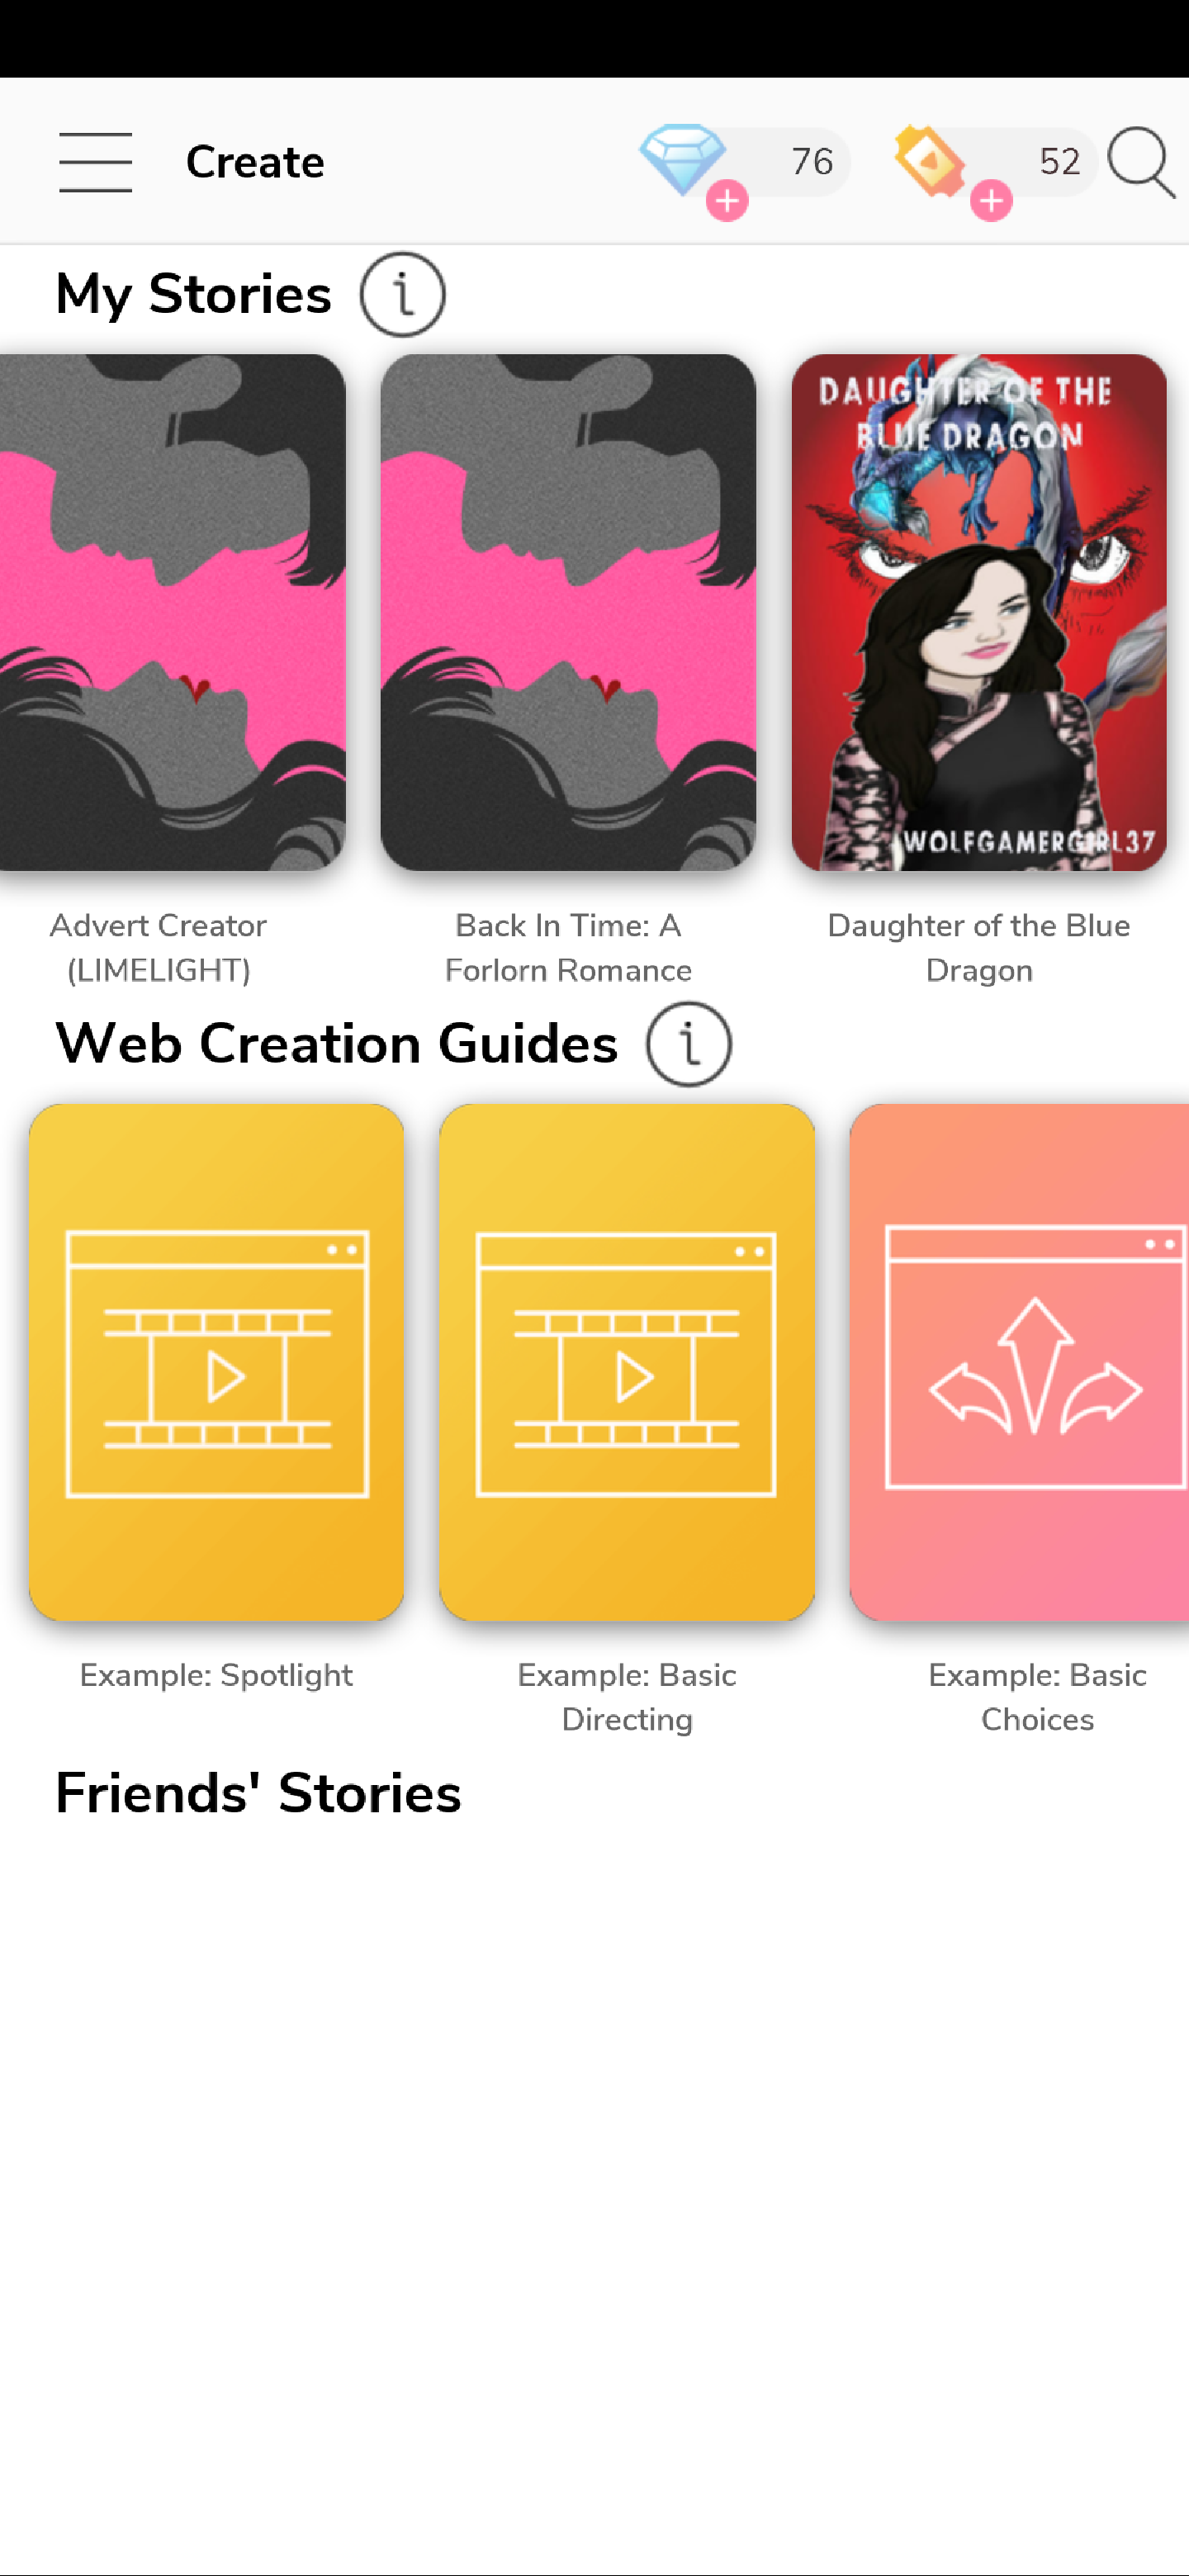
Below that is the create tab, which lets you write Episode stories on your phone as well as read the ones you’ve written using the Writer’s Portal and the Settings tab, which looks like this:

Starting a story
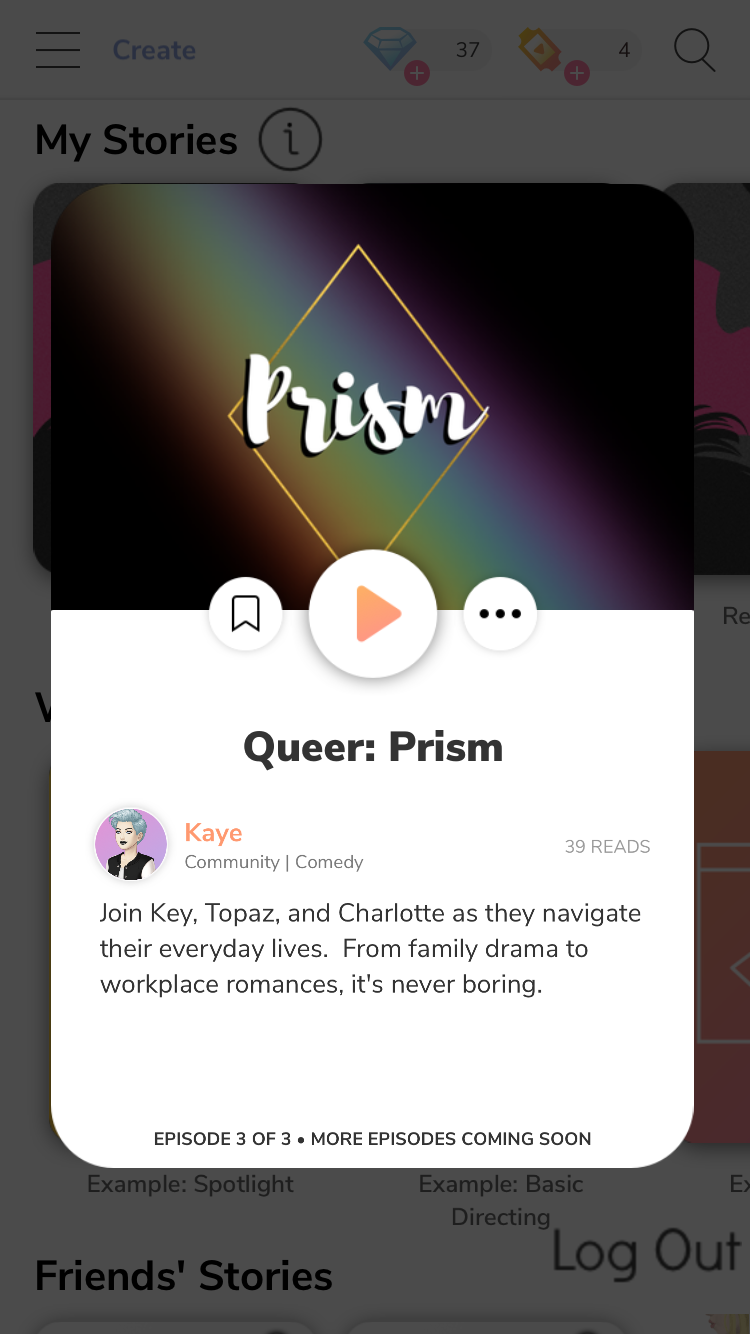
To start reading a story, click on the cover from one of the shelves. A thing will pop up with the story’s large cover and below it is the author and the description. To start the story, click on the orange play button.

Adding stories to favourites
You can add stories to the My Favourites tab on the home screen to make it easier to find them again. There are three ways to add a story to your favourites. The first is through the same place where you press the play button. On the left side of the play button is a bookmark-esuqe shape on a button, pressing the button will add the story to your favourites. On the other side of the play button is three dots. When you click those three dots, a menu will pop up, one option on it is “Add to Favourites”

The last way is when you click the door icon in the top left hand corner of the chapter you’re reading. If the story isn’t in your favourites, a pop up window will appear with the option to add the story to your favourites

Gems and Passes
You can see how many Gems and Passes you have in the top right hand corner, beside the magnifying glass. Gems can be used during featured stories for the infamous gem choices which can be outfits or story decisions. Passes are how you read the next episode of a story you’re reading. Passes get replenished every four hours. When you first start using the app, you earn three passes every time it replenishes, but after a certain number of chapters read, you earn four passes.

I hope this guide was helpful to anyone who is new to the Episode app! If you have any questions or noticed something that I missed, don’t hesitate to ask!
You can also check out this wiki for more information: Episode Wiki | Fandom

9 Likes

How to test your story in the app

  1. Getting to the Create Tab & Not the Profile Tab

    • First, what you will need to do is open the app up. Make sure you go down to the Create Tab instead of the Profile Tab.
    • If you go through your profile one, it will charge you a ticket instead of testing it. You will be reading as a reader.
  2. Create Tab

    • Find your story amongst the titles that you wish to test. Click the title to open up the test previewer.
  • The different titles on the second row are guides that you can go through to get a better understanding of the coding. This is a visual guide to the manuals that are in the web portal section on your computer.
  1. From here, you have access to all the testing buttons that shows on the web previewer on the computer. They work correctly when you are fixing them on the computer then testing on the phone. It’s much easier to see if something messes up in the episode that is visibly shown on the web previewer.

  2. Main Page of Previewer

    • You can go back 1 line or ten lines buttons when testing the story. You can do this going forward as well. These four buttons are the top two tabs on both the right and left sides of the screen.
    • You also have the Update script button, which updates the changes made on the story. I use this part when dealing with directing mistakes. This tab is located on the left below the go back ten lines button.
  3. Navigation Tab

    • You get to the navigation tab, which is on the right-hand side of the screen. This tab lets you navigate through many sections of your story. You can change between the different episodes as well as the various scenes in those episodes.
    • The Hide debug elements of HUD is where you can remove all the previewer buttons from the screen. This is so you can take videos and screenshots of your story without having to worry about all the tabs.
    • Reset Story progress does the same thing as Update your story button, but instead of starting you off at the beginning of the scene, you are testing it will take you back to the beginning. It clears all the choices made in that episode.
    • Restart Episode does the same thing, but it does not reset your past choices.
    • Labels tab is where you can click on the different labels in your story, which will automatically take you to those labels. It’s helpful when you have to test the names to make sure they work.
    • Choices tab does the same thing as the Labels tab. It will take to the different choices in your story that you are testing.
  4. Story Modifiers

    • This is where you will find your point system, flags, or counters that you use in the story. I’m not going over this part as much since I don’t use the section at all.
  5. Story Helpers

    • Camera Tab is where you mess around how you want the camera to show. You have a Zoom function, which allows you to zoom closer to your character’s face or even an overlay on the screen. You can also zoom out to the point that you see the edges of the background. Focus helps you pick a pinpoint spot once you are zoomed in. This is the first button on the left of the three tabs. You can move the camera around all around the zone in that scene. This is the second button out of the three tabs on the left. The Reset tab reverts to what the view as if you didn’t save. This tab is on the left, which is the third button out of the three buttons.
    • Spot Directing is where you can move characters around to the many different spots in the zones. The first tab is where you can move the characters plus scale them to a specific size. You will need to click on the button to change between the two functions. The second tab Bring to the front brings the character you are working on to the leading layer of the story. This can help you if you need to change the character’s layering altogether. The third button enables you to put the characters on a different layer level when testing if you do not like the original placement. This button uses the forward layers instead. You can then use that coding on your computer. The fourth button is another layer coding button, but this one goes backward instead. It works the same way as the third button. The fifth tab puts your character on the farthest layer in the back. It’s the reverse of the Forward Button.
  • Speech Bubbles Tab helps you with the different placements, sizes, focus of each speech bubble. The first button is the show/hide button; this one lets you hide the bubble in the image or show the bubble. It can be helpful if you are wanting to get a look at what is going on in the scene with the bubble invisible. The second button is where you can cycle the different tails the speech bubbles offer, whether you like it on the top left, bottom left, top right, and even bottom right placements. The third button cycles through the different arrangements that the speech bubble sits in the scene. Don’t forget you can move it manually with your finger too. The last two buttons help you scale the size of the speech bubble plus how you can move the speech bubble around with your fingers.
  • HSL filter is where you can change the color of the camera lens. This is where you can get the black and white filming look, put in a red filter for a horror scene, and much more. I would suggest looking at the guides before you mess with this part on your own.

    So, those are the parts you can use when testing your story through the create tab. Let me know if you have any problems with this.

@Discussions

3 Likes

Thank you for adding this!

2 Likes

You’re welcome!

1 Like

@Episodians Does anyone have any questions or something to add to this great tutorial? :smiley_cat:

1 Like

DONT READ THE FEATURED STORIES

3 Likes

Closed due to inactivity