Beginner Tricks
Before starting with your work of art, appealing design, or incredible creation, here are some quick tricks to set up first. They may help you when you get stuck into it.
Project History:
Found here:
Either in the side panel to the right (shown below) or go to “window” drop-down menu up the top and then down to “history.”
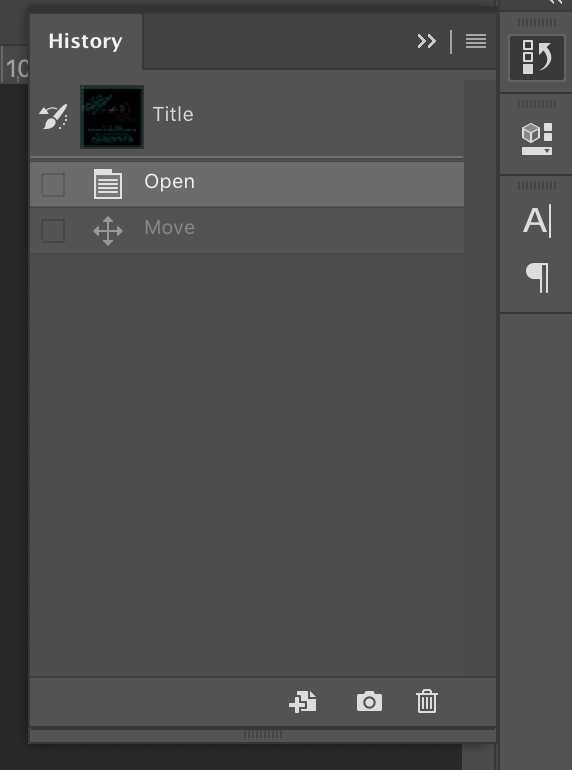
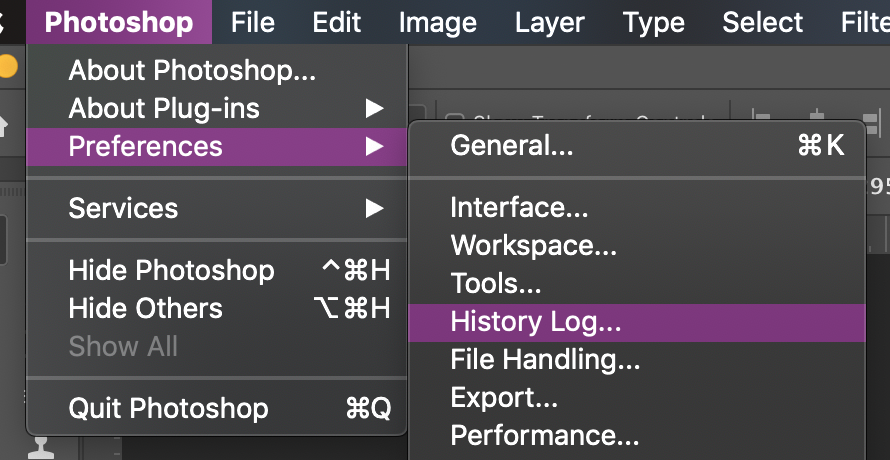
This will show you a chronological view of everything you do in your working session until you close the application completely. From memory, I believe the history holds 50 of the most recent actions before deleting the oldest. So the best thing to do is to go to “photoshop” then “preferences” to at least triple the number of actions the held in file session history.
Rotating
One of the handiest tricks that I love to use is “Cmd/Ctrl+T”! So you can then rotate or warp any kind of image/shape you like, or even a text box despite being able to do that with the type tool.
This is also the shortcut “Cmd/Ctrl+Shift+Alt+T”, which allows you to duplicate and transform the image/shape.
Create Text Images

Only a couple of clicks and bob’s your uncle. Just move the image layer you want so it sits just above the type layer in the layer list. Then hold down ‘Alt’ and click the line between the two layers.

Adding a Vignette to image/photos:
What is it? It’s a faded darkened border of the subject in an image to look like the old-fashioned style photos/images.

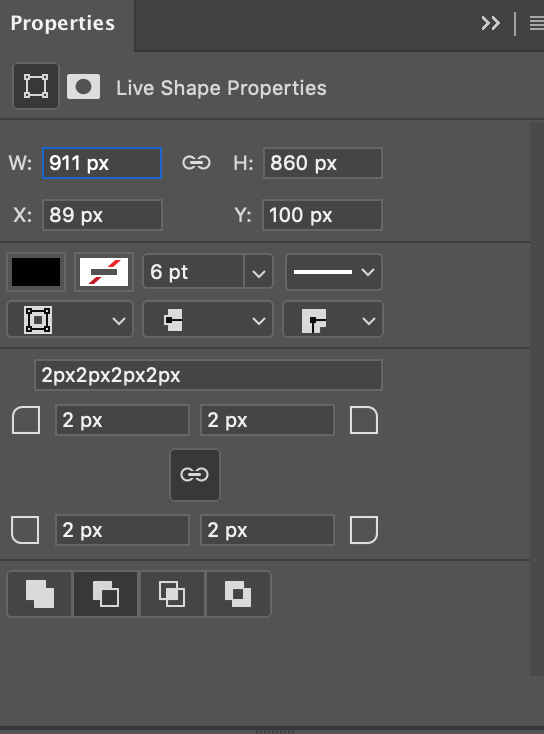
Find the Shape tool (see above in the first post) and select either the Rounded rectangle or the ellipse shape. Use that tool to draw over the area of the photo you want to emphasise and it will create the shape on a new layer.
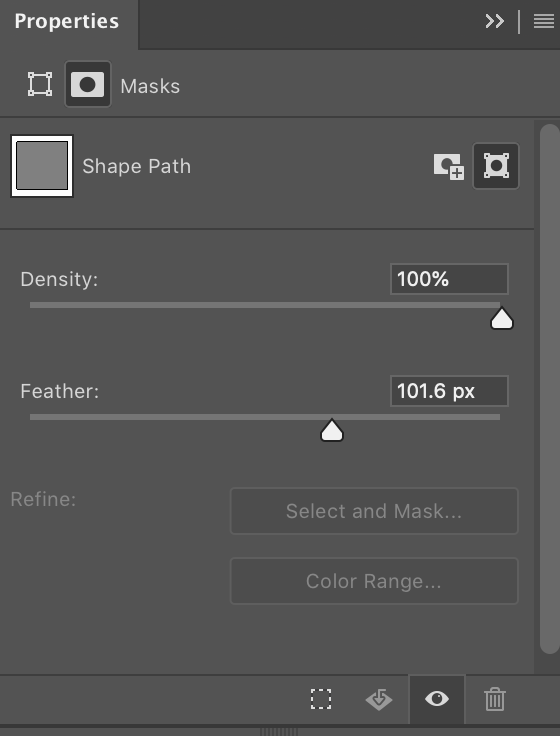
Go to the properties and press the “subtract front shape” button. This will switch the black fill colour to outside of the shape you’ve just created Then click the mask button and you can increase the feather setting. In the layers panel, you can adjust the opacity on the shape layer to refine the vignette.