Photoshop offers users the ability to create, enhance, or otherwise edit images, artwork, and illustrations. Changing backgrounds, simulating a real-life painting, or creating an alternative view of the universe are all possible with Adobe Photoshop.
Though it is an expensive product, there is a way to get a free trial but only for 7 days. More info can be found here.
Alright, so here’s a guide for anyone who has Photoshop or has any interest in using it in the future.
Setting Up
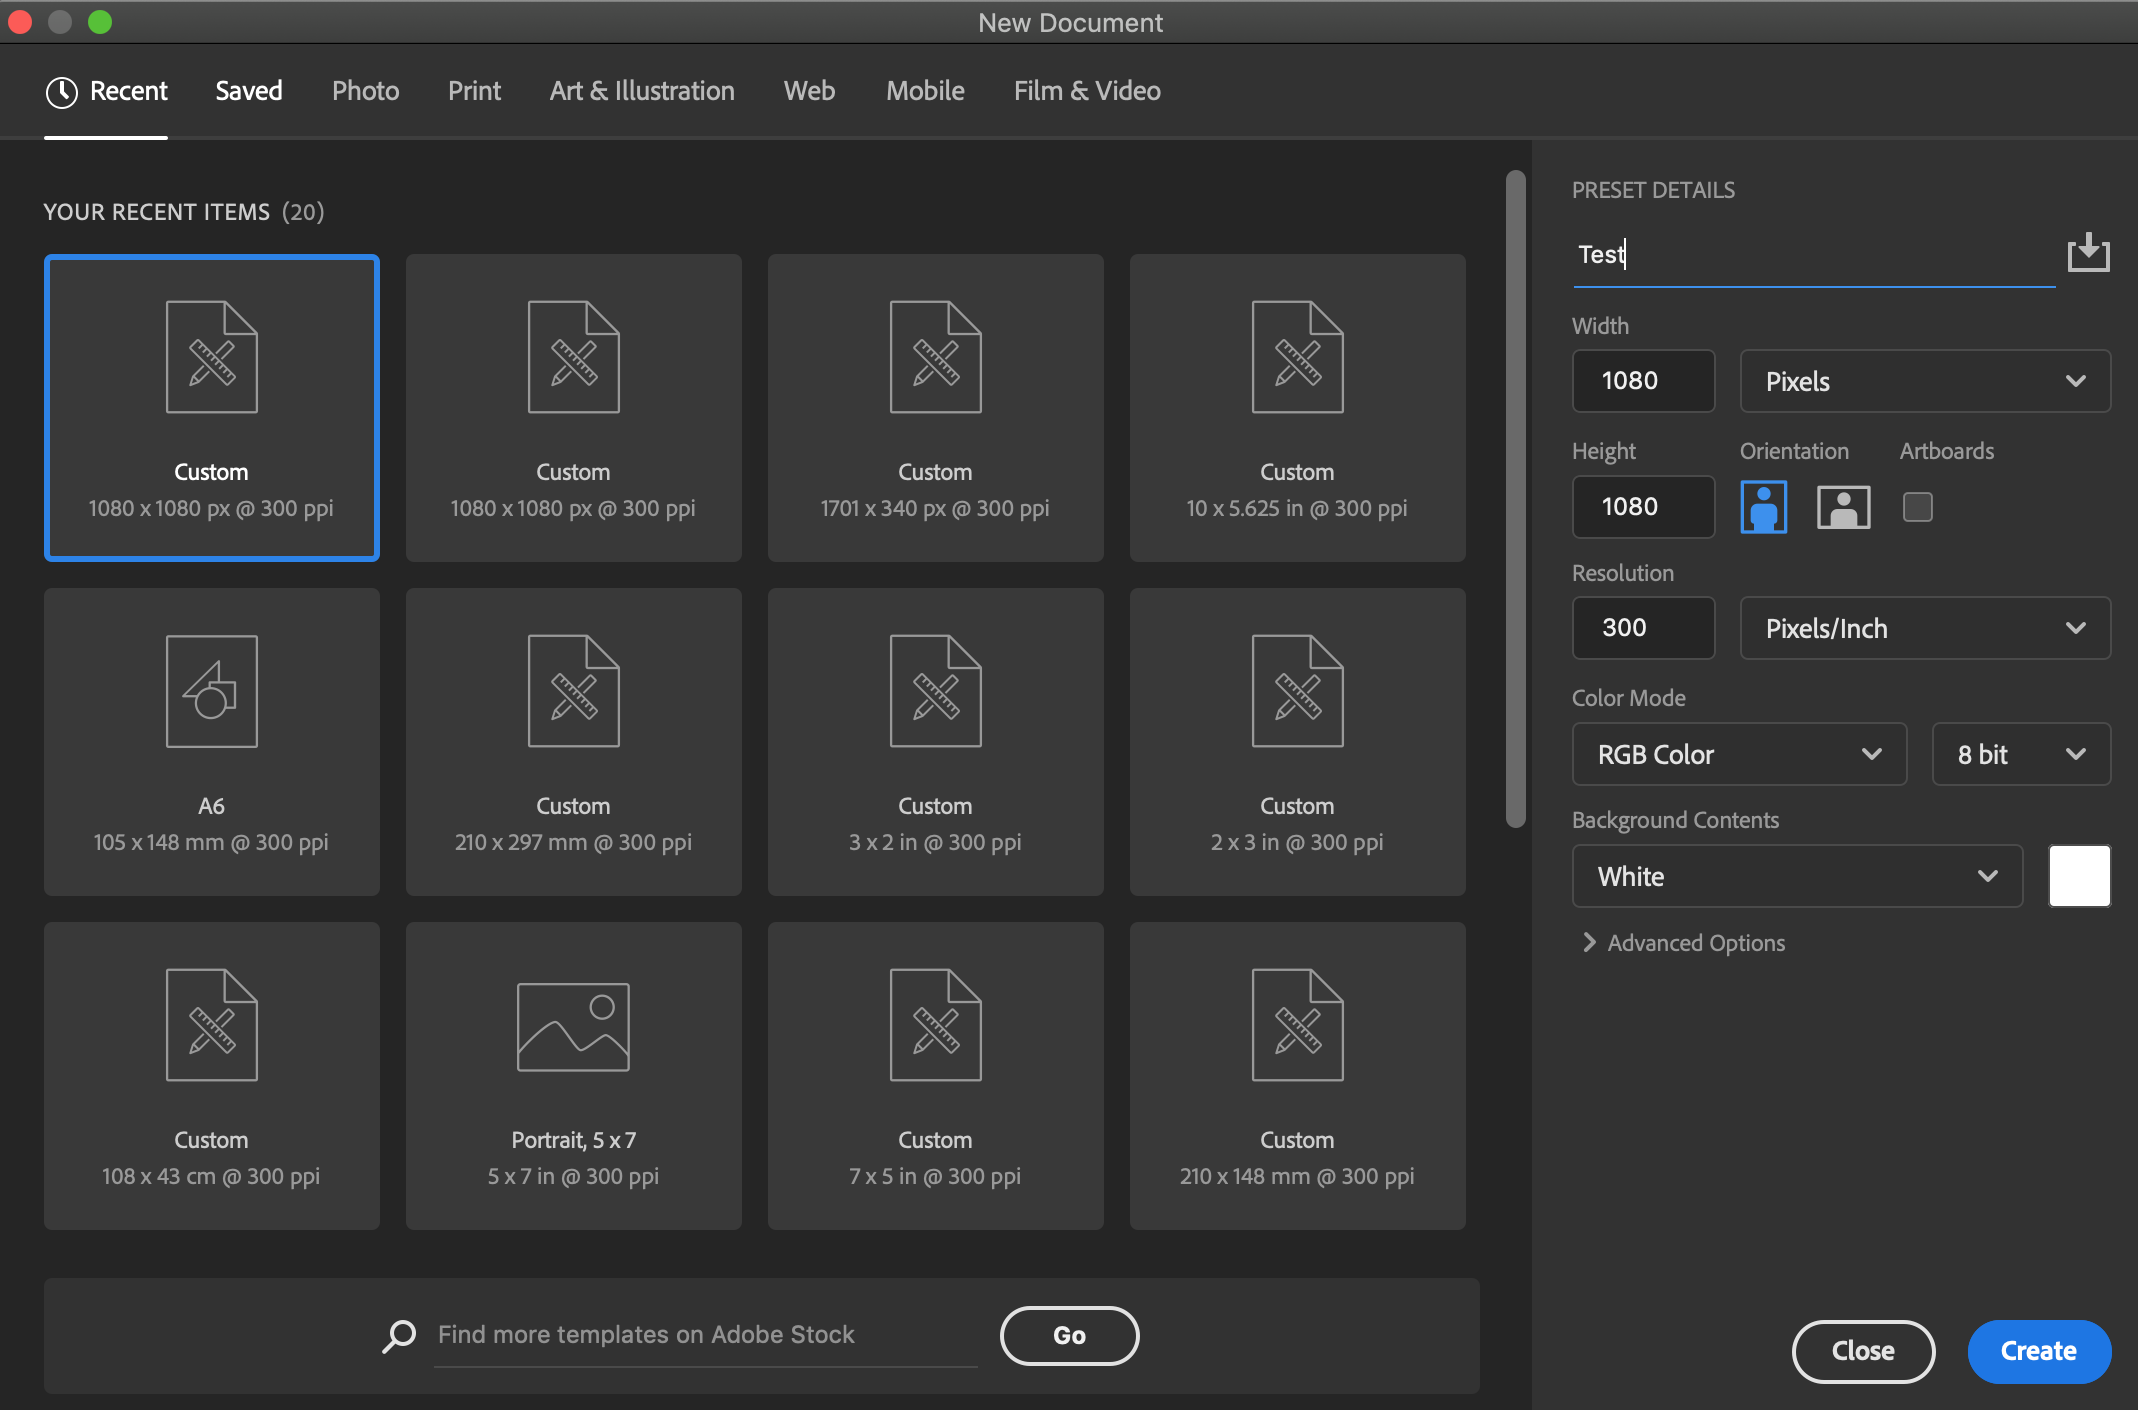
Click the programme and then on “Create new” when Photoshop is up.
Name: The document name
Width: The document width, which you can change to inches, cm, etc.
Height: The document height, which you can change to inches, cm, etc.
Resolution: The document’s resolution. 72 PPI is used for Web and 300 PPI is for Print. PPI stands for ‘Pixels Per Inch’
Color Mode: This is the colour type for your document. I suggest you leave it as RGB Color for now and keep it as 8 Bit, though it depends on later when you start printing your work.
Background Contents: This is what your background will be. I suggest you leave it as White.
Advanced Settings: This is for advance users. You can just leave it as it is.
Move Tool: This tool can be used to move items around
Marquee Tools: These tools can be used to make selections. Rectangular, for a Rectangular selection Elliptical, for an Elliptical selection SingleColumn, to make a Column selection SingleRow, to make a Row selection
Lasso: These tools can also be used to make selections. Lasso, for freehand selections PolygonalLasso, for a selection with lines MagneticLasso, a selection by shaping onto objects.
Quick Selection: These tools can be used to make a selection of objects by painting on them with an adjustable brush.
Magic Wand: Used by selecting pixels in an image based on shapes or by selecting pixels based on tone and colour.
Crop & Splice Tools
These tools can be used to trim images.
Measuring Tools
Eyedropper: used to sample a colour in an image, for you to duplicate it.
Retouching Tools
Spot healing/patch tools: Used to clone areas from an image and blend the pixels from the sampled area seamlessly with the target area.
Stamp tools: Used for pixel-to-pixel cloning, when you don’t want to blend the pixels.
Tools under the erasers: Basically do as they say. The Dodge and Burn tools lighten or darken areas of the image.
Painting Tools:
Brush & Pencil Tools: Basically do as they say
As do the rest of the tools in this section.
Drawing & Type Tools:
Pens: These tools can be used to create smooth-edged paths. Either straight or curved lines, or lines to create shapes.
Type Tool: These tools create text boxes that can be used to type text into.
Shape Tools: These tools can be used to create shapes.
Navigation Tools:
Hand: This tool can be used to move an image within the window.
Zoom: Zoom in and out.
If people are interested in this then I’m happy to post more guides at a later date. (wink) Just comment if it is useful for you.
Before starting with your work of art, appealing design, or incredible creation, here are some quick tricks to set up first. They may help you when you get stuck into it.
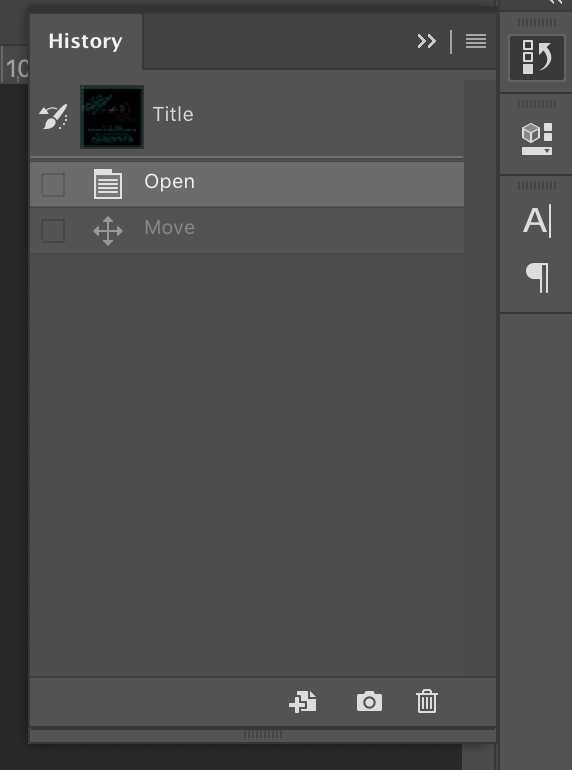
Project History:
Found here:
Either in the side panel to the right (shown below) or go to “window” drop-down menu up the top and then down to “history.”
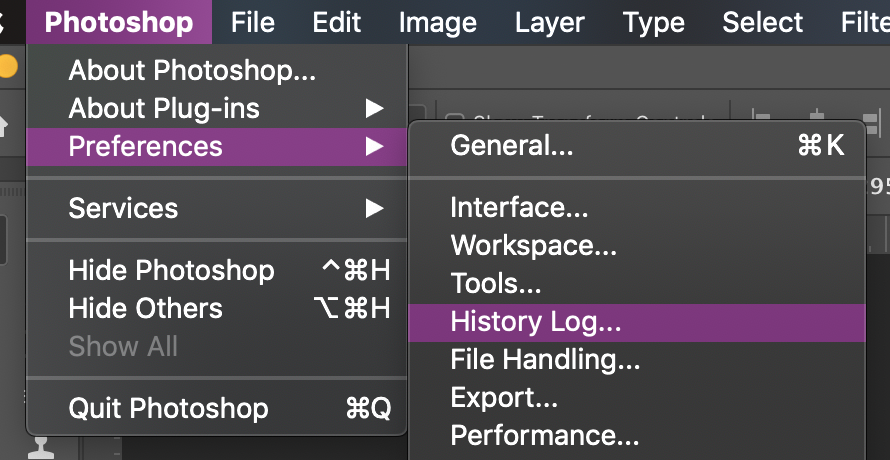
This will show you a chronological view of everything you do in your working session until you close the application completely. From memory, I believe the history holds 50 of the most recent actions before deleting the oldest. So the best thing to do is to go to “photoshop” then “preferences” to at least triple the number of actions the held in file session history.
One of the handiest tricks that I love to use is “Cmd/Ctrl+T”! So you can then rotate or warp any kind of image/shape you like, or even a text box despite being able to do that with the type tool.
This is also the shortcut “Cmd/Ctrl+Shift+Alt+T”, which allows you to duplicate and transform the image/shape.
Only a couple of clicks and bob’s your uncle. Just move the image layer you want so it sits just above the type layer in the layer list. Then hold down ‘Alt’ and click the line between the two layers.
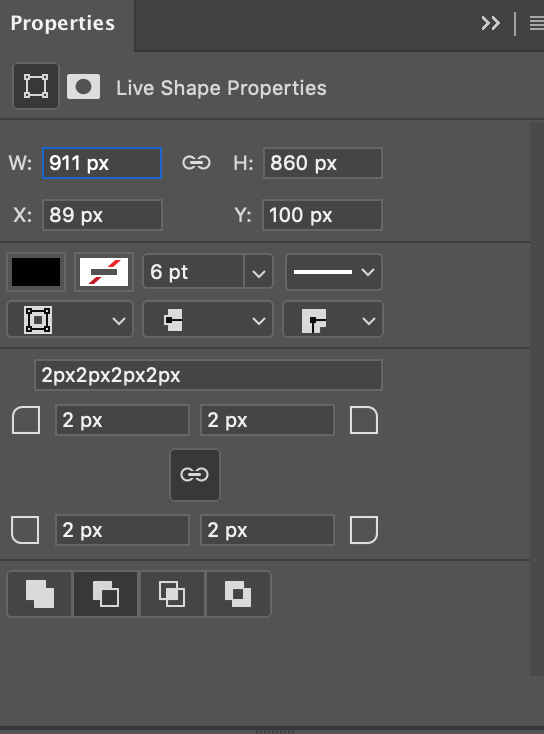
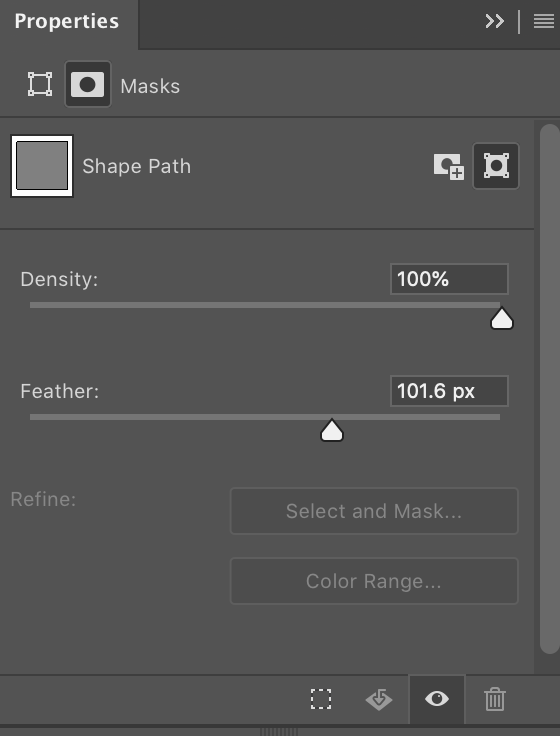
Find the Shape tool (see above in the first post) and select either the Rounded rectangle or the ellipse shape. Use that tool to draw over the area of the photo you want to emphasise and it will create the shape on a new layer.
Go to the properties and press the “subtract front shape” button. This will switch the black fill colour to outside of the shape you’ve just created Then click the mask button and you can increase the feather setting. In the layers panel, you can adjust the opacity on the shape layer to refine the vignette.
Oh wow, this is soo helpful! I used to love Photoshop when I had the free version but never new how to use all the features. But now I’d really like to get it again. Photoshop looks really scary if you have no idea how to use it, but it’s actually really great
I don’t use photoshop that much. Mostly for drawing and some episode edits The tools I use the most are the brush, eraser, lasso and layers and also shortcuts hehe. The eye dropper and smudge thingy Hm… I have an old version though and I don’t know how to import brushes
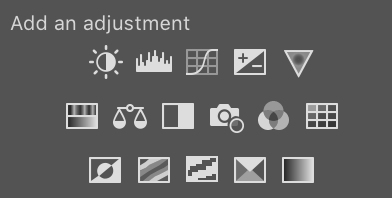
(Discussing them left to right, row by row)
Each one can be set to the whole image or individual layers.
Top row
Brightness/Contrast: This makes adjustments to the tone of the image. Brightness adjusts the highlights or darkens the colours while Contrast adjust the shadows.
Levels: Similar to above, but it adjusts the levels of the shadows, midtones, and highlights. It is very handy when adding just a little finesse to your images.
Curves: Again, similar to the above two, but this lets you adjust as many points as you want throughout the entire tonal range of your image. The diagonal line on a graph represents your image’s tonal range. The x-axis is the original values of the image while the y-axis is the new adjusted values. Adding points along the line will increase the overall quality and contrast of your image, the you can drag the point up or down with your mouse to darken or bright your image however you’d like.
Exposure: This has three exposure adjustment levels; Exposure (adjust only the highlights), Offset (adjusts the mid tones) and Gamma (adjusts only the dark tones).
Vibrance: This is where you can adjustment the image for how vibrant and/or saturated the colours are.