I’m sorry if this is in the wrong category! I didn’t know where else to put it
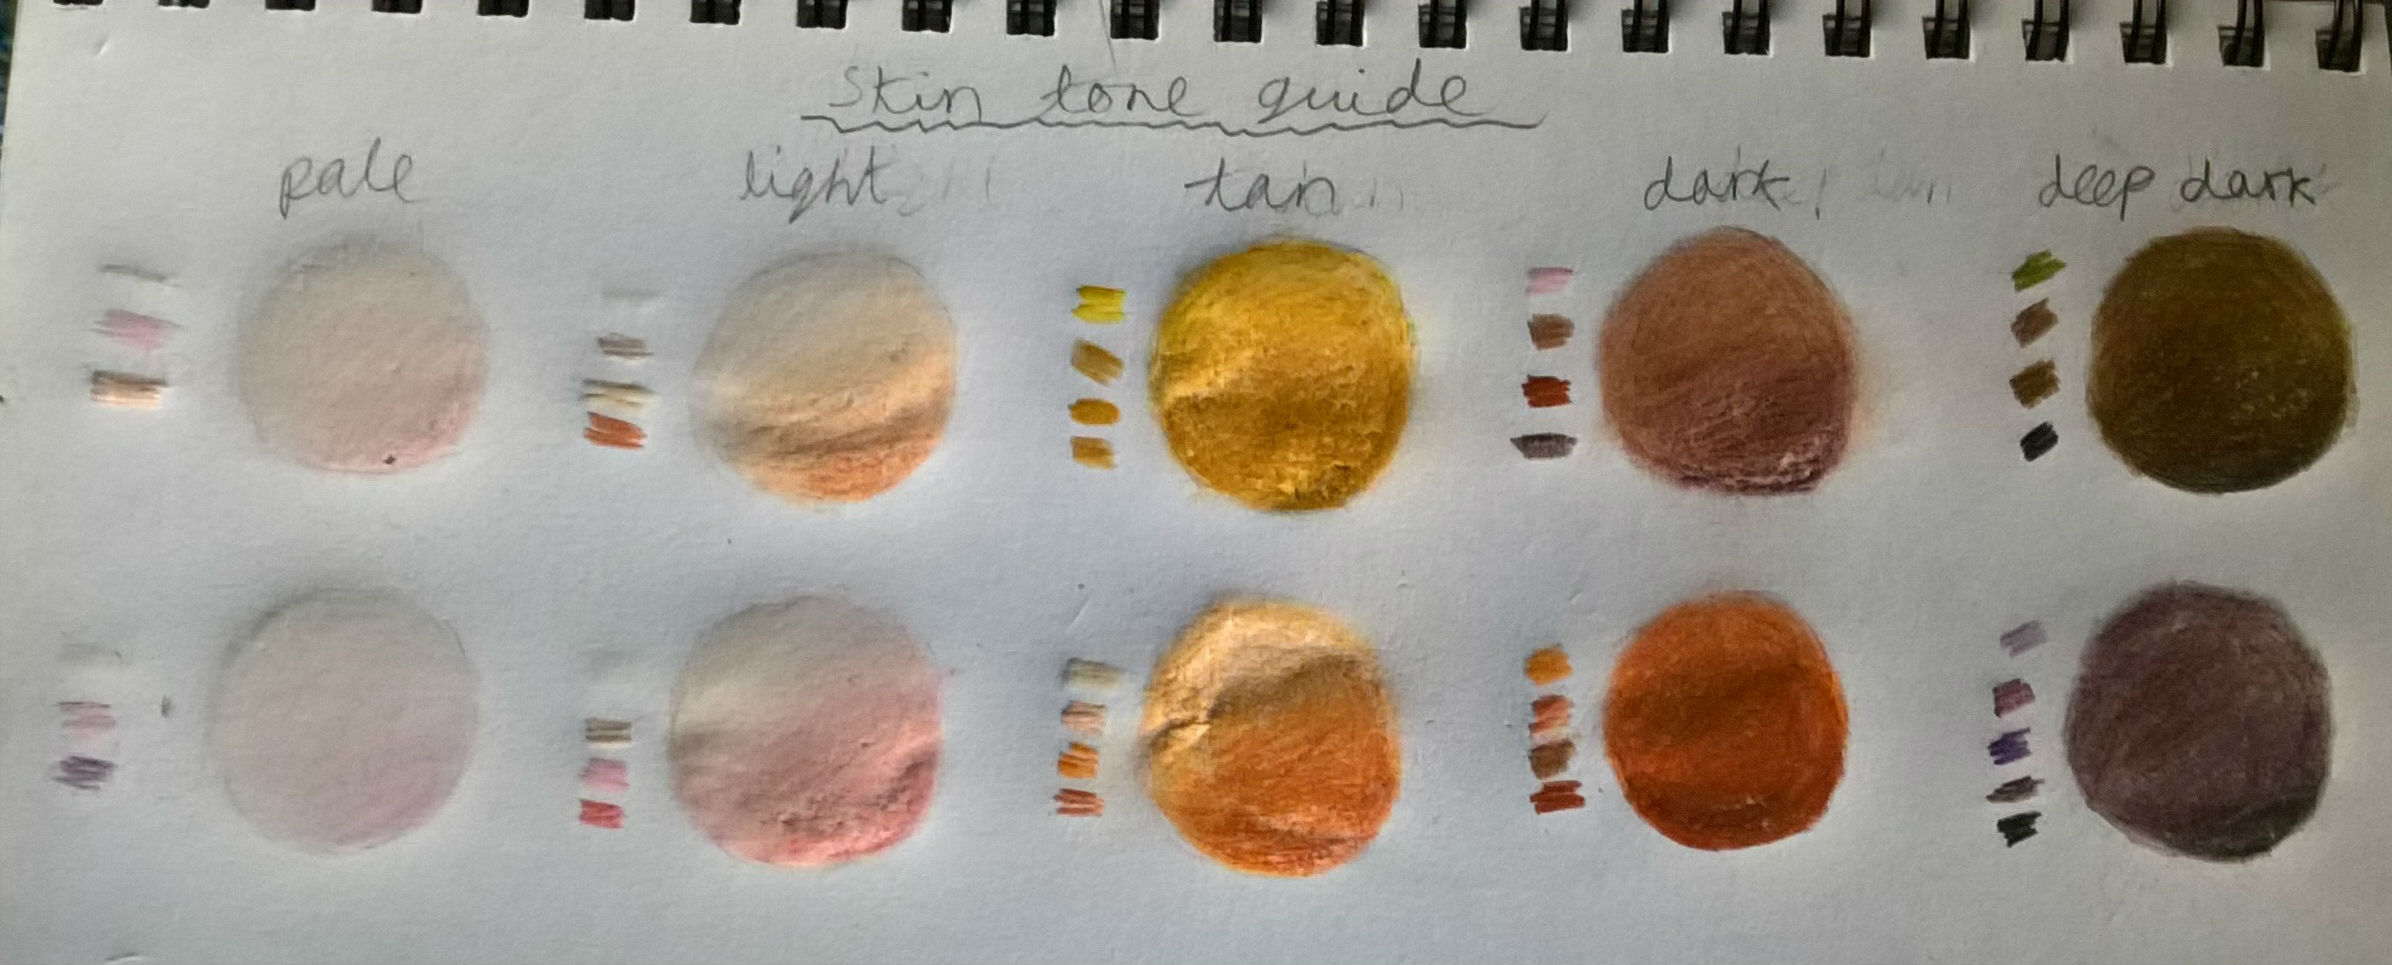
Colouring Pencil Skin Tone Guide
Welcome! I made a
poll on whether anyone was interested in a tutorial and 9 of you said yes so here it is! I’m going to break it down into 9 sections:
- The Basics
- Base colours and mid-tones
- Pencil Prep
- Difference between “Pale” and “Light”
- Difference between “Dark” and “Deep Dark”
- Pale Skin Tones
- Light Skin Tones
- Tan Skin Tones
- Dark Skin Tones
- Deep Dark Skin Tones
- Summary - Do’s and Dont’s
Before anyone asks, the weird patchy texture is from using my rubber too much and it made the paper flaky 
Equipment Used
- A4 Paper
- Derwent Artists 24
- Derwent Coloursoft
- Staedtler 36 Colouring Pencils
13 Likes
1. The Basics
Base colours and mid-tones
A base colour is the “default” colour you’ll use first. These colours are either but not limited to light yellow, salmon pink, lilac, ochre or pink. These are the colours which are supposed to represent the overall colour or effect of the skin tone. The types of base colours you use will determine the skin’s outcome:
- Light yellow - Ivory, Olive
- Salmon pink - Neutral, Copper, Peach
- Pink - Rosy
- Lilac - “Purplely” Deep Dark Skin, Cool Pale Skin
- Ochre - Olive, Gold
- Green - Olive, Gold
A mid tone is between a light and a dark tone, so basically what’s between the highlight of the skin and it’s shadow. As listed above, these colours are examples of mid-tones and they act as the “main” colour. When colouring skin, you’re breaking it into three stages:
- Base Colour
- Mid-tone
- Shadow
Pencil Prep
When using colouring pencils, you’ll need to do a brief preparation. This is what I’ll do:
- Gather my pencils - base colour, mid-tone and shadow
- Sharpen - it’s easier to use a sharp than a blunt pencil
- Clean your rubber - prevents colours from previous drawings affecting the paper
Continuously sharpen your pencil! This will help you to evenly apply colour across the page and also easier to rub out mistakes.
1 Like
2. Difference between “Pale” and “Light"
At first glance, you could consider them all “light” or all “pale” but there are differences and it’s important to note them:
- White pencil used differently - The highlight of pale skin is white/off-white but the colour used to blend light skin is white
- Light has darker shadow - In comparison, “light” is darker and so it’s shadows are darker
- Light requires more pressure - “Light” requires pressing harder with the pencil whilst “pale” requires light pressure throughout
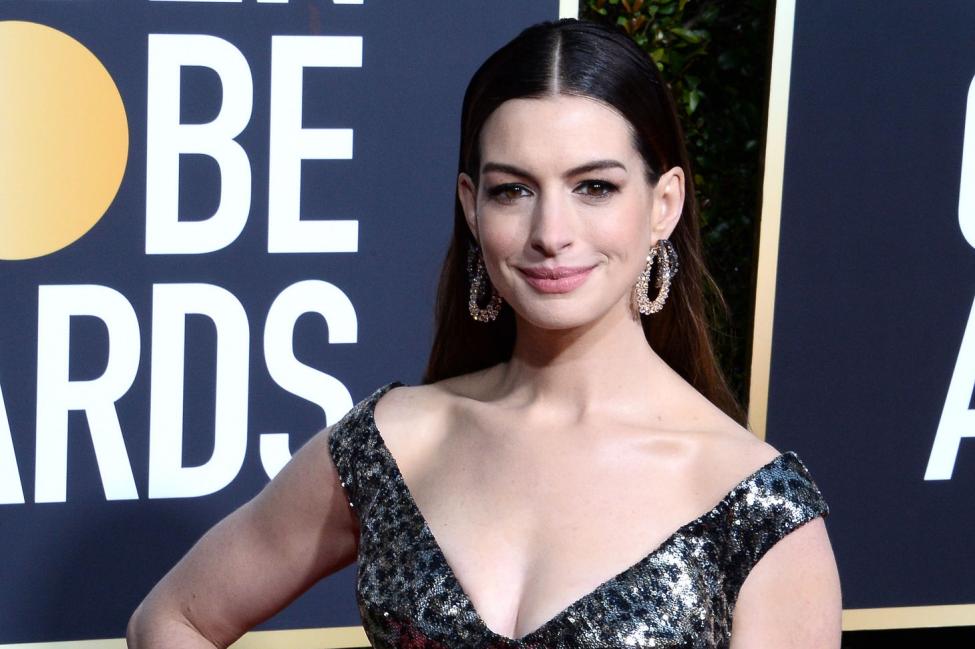
When referring to “pale” skin think Anne Hathaway:
When referring to “light” skin think Kristen Bell:
3 Likes
3. Difference between “Dark” and “Deep Dark”
Again, notable differences:
- Deep Dark has darker shadows - “Deep dark” has darker shadows and this is usually achieved via blue or black pencil, whilst “Dark” is just dark brown.
- Difference between pressure and highlight - “Dark” uses dark brown pressed lightly as the highlight and blended with the base colour. “Deep dark” uses dark brown pressed hard as the highlight and blended with the base colour.
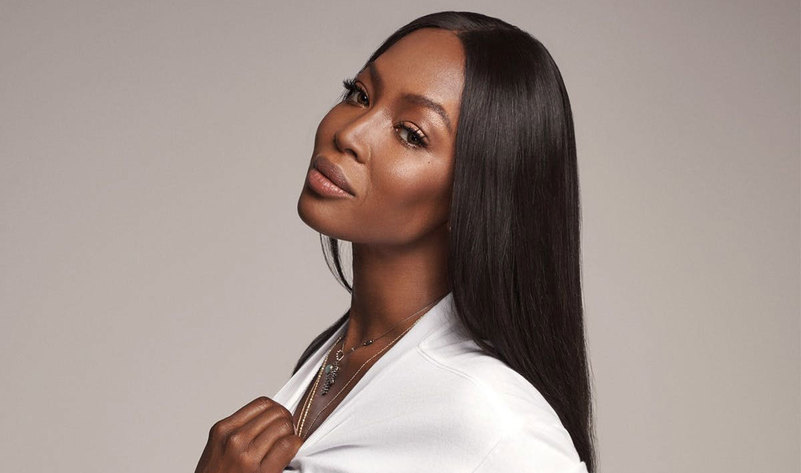
When referring to “dark” skin think Naomi Campbell:
When referring to “deep dark” skin think Lupita Nyong’o:
3 Likes
Moved to category “Share - Art Exercises”! 
1 Like
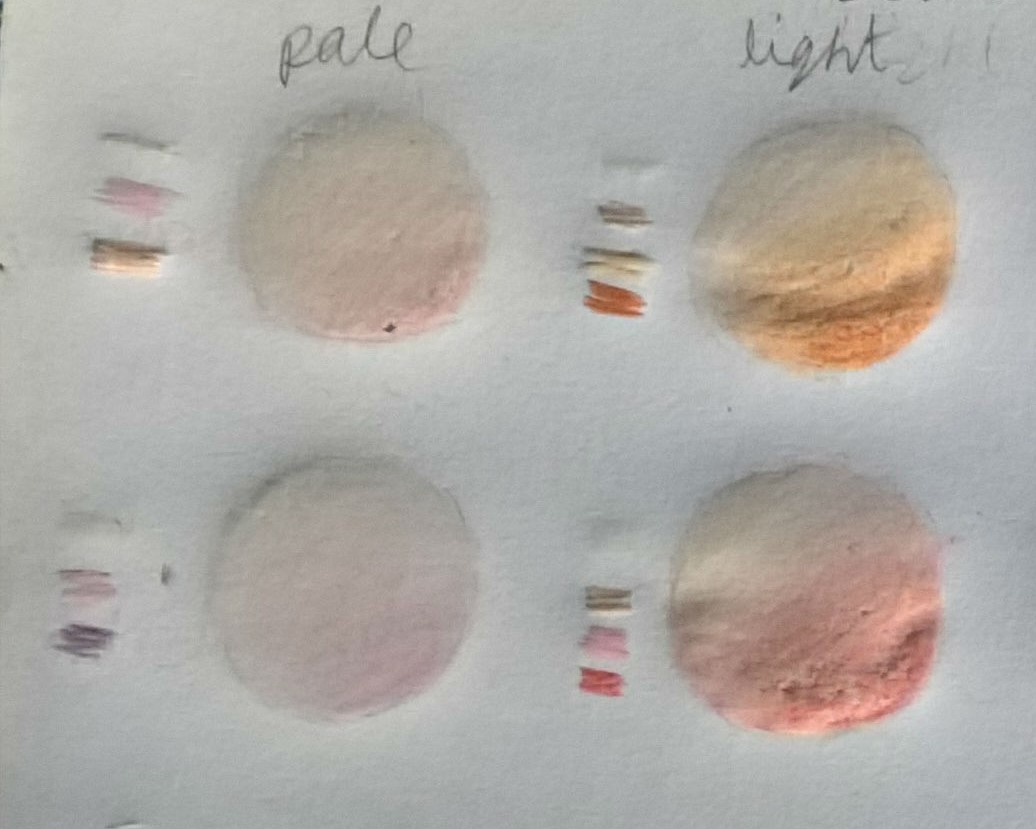
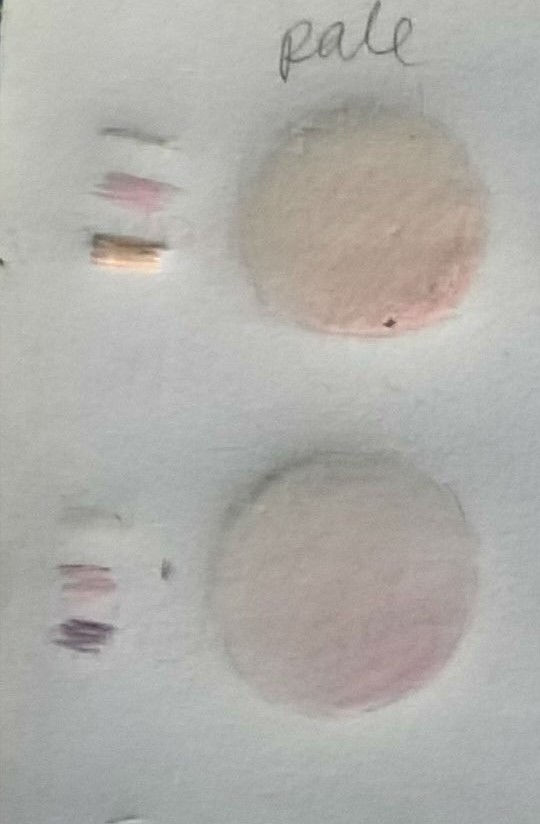
4. Pale Skin Tones
My two pale skin tones are rosy and cool:
To create pale skin tones I use around three pencils only to create as light a colour as possible. I recommend using a white pencil not only for the skin itself but to blend.
- Use your base colour as your mid-tone - If you use light pink, for example, begin by lightly applying this to your paper. Begin shading also using this colour but be careful not to press too hard.
- Overlap your second colour - Use your second colour, for example, lilac or salmon pink in my case, and use this to overlap your existing pink layer. No skin tone is purely one colour and this also “softens” the overall look.
- Blend with white pencil - This will remove patchiness but also go a step further and lighten the skin overall which will correct where you’ve pressed too hard.
- Press hard with white pencil - With your white pencil press hard for the highlight. This is an easy way of achieving a highlight on pale skin.
3 Likes
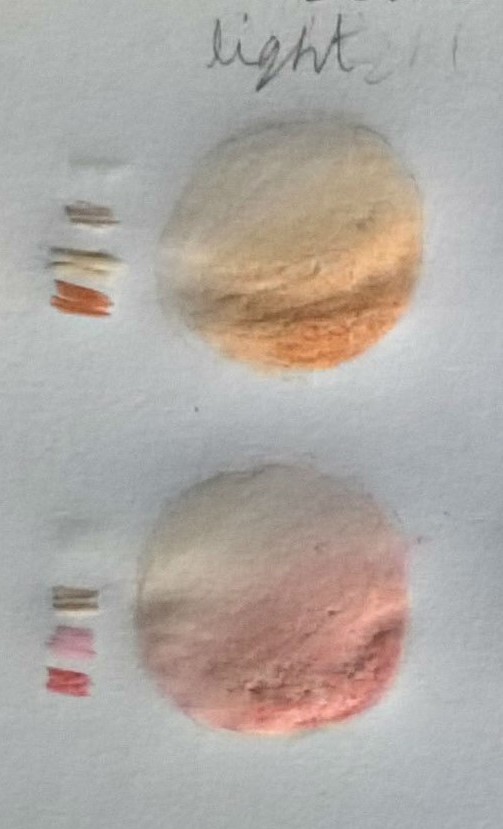
5. Light Skin Tones
My two light skin tones are peach and rosy:
I use about 4 pencils for this. Before, we could use our base and our mid-tone as one colour but this time they’re 2 different colours:
- Apply your base colour - Lightly apply your base, which could be a salmon pink or light pink for example.
- Shade with your mid-tone - Use your mid-tone (A different shade of pink/salmon in my case) as your temporary shadow. This establishes where the mid-tone will go and your main shadow.
- Apply your base again - I’d recommend you do this each time you add the other colours. This keeps your overall skin tone consistent.
- Apply your shadow - Use a darker shade of your base as your shadow. Again, this keeps the overall skin tone consistent.
- Re-apply previous colours - This makes sure each colour has been applied evenly and equally.
- Blend with white pencil - Removes patchiness and should give you a smooth look.
3 Likes
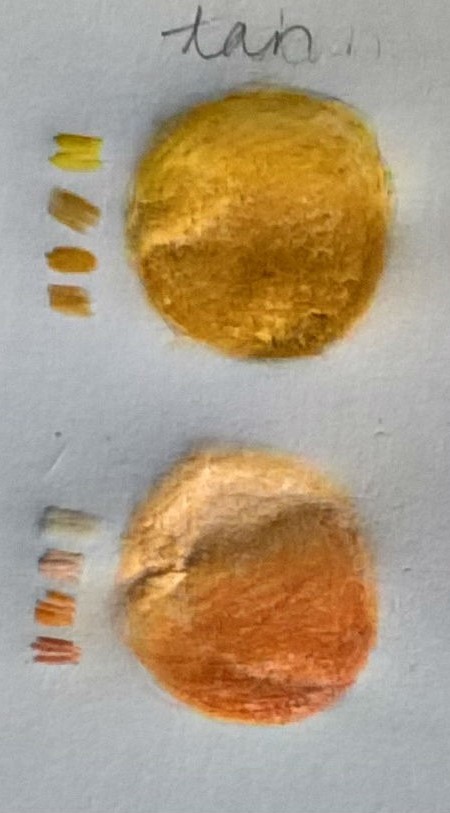
6. Tan Skin Tones
My two tan skin tones are ochre/gold and copper:
This is where the technique changes from now on:
- Start with the dark colours - The desired outcome is a darker skin tone, so pressing harder with the pencil is now a priority
- Blend with the base colour - White pencil will make the skin appear washed out or worse, ashy, so a darker and more pigmented blend colour would help to cover up patchiness whilst still maintaining the overall colour.
- Differentiate your main colour and mid-tone - Have a main colour e.g. ochre and mid-tone e.g. gold ochre - the differences in mid-tone are slightly more visible in darker skin.
I use 4 pencils - a colour as a base and blend, the main colour, a colour with a different shade to the main acting as a mid-tone and a shading colour.
- Apply your base colour - This still needs to be done however for a darker skin tone, use a darker version of the bases we used before, such as ochre, lilac, green, orange or salmon pink - still press lightly for this step.
- Apply your shadow - Shade using average pencil pressure, pressing lighter closer to where the main colour or mid-tone would be.
- Apply your mid-tone and main colour - Using the same technique as step 2, apply your mid-tone and main colour.
- Re-apply any colours that look weakened - Starting from darkest to lightest, re-apply the colours using light pressure to average pressure.
- Blend with base colour - This will establish the colour of your highlight and remove patchiness.
3 Likes
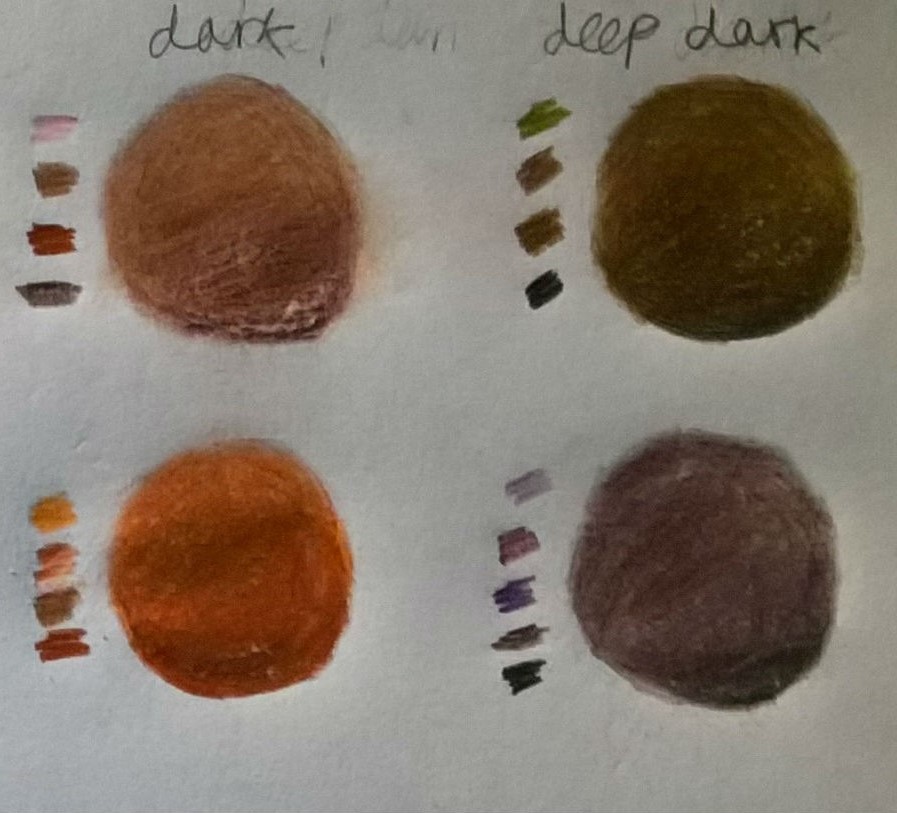
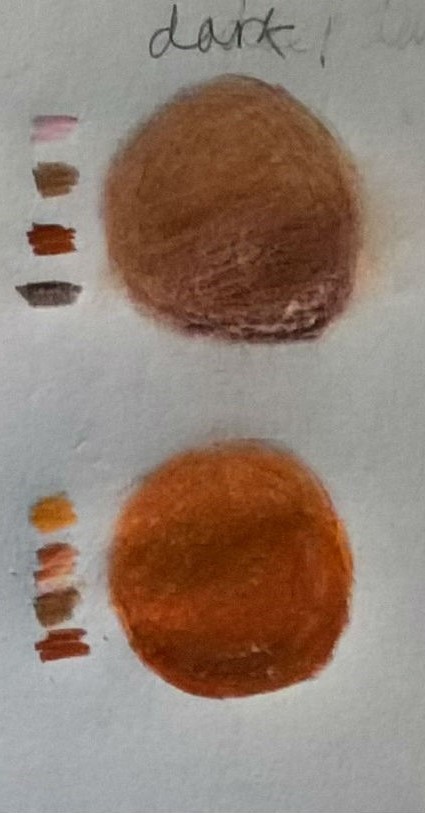
7. Dark Skin Tones
My two dark skin tones are chestnut and terracotta:
4 pencils for this but this time it’s ok to use more pencil pressure. I’d recommend using average pencil pressure throughout, including the applying of the base:
- Apply your base - Apply the base but feel free to not press as lightly. Try using an orange instead of salmon pink or a regular pink instead of light pink.
- Apply your main colour - Apply your main the same way you did the base - same areas and same pressure.
- Add shadows - Use your shading colour and press hard in the darkest areas, using a dark version of your main colour
- Add the mid-tone and main colour - Using the same technique from step 3, use your mid-tone and main colour.
- Re-apply any colours that look weakened - Starting from darkest to lightest, re-apply the colours using light pressure to average pressure.
- Blend with base colour - Removes patchiness and establishes the colour of your highlight which should be an combination of your base and main colours.
3 Likes
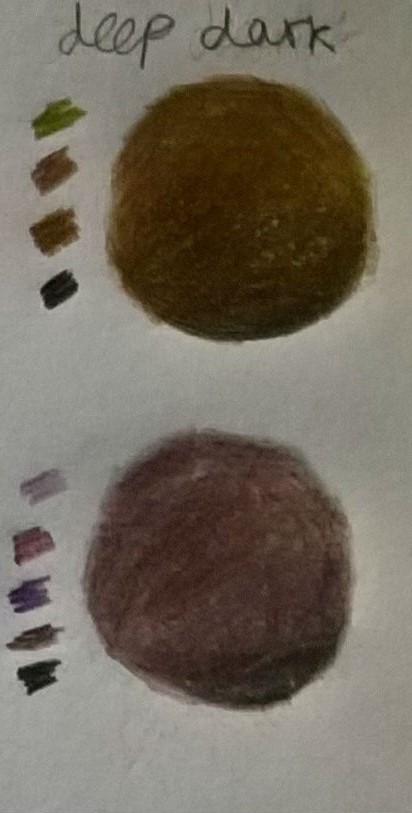
8. Deep Dark Skin Tones
My two deep dark skin tones are olive and cool deep dark/“purple”:
This time you might need 5 pencils (base, main, mid-tone, shadow) including a black or dark blue pencil for even darker shadows. Press fairly hard throughout:
- Apply your base - Apply the base but with average pressure. Try using an unconventional colour such as green, red or lilac.
- Add shadows - Use a black or dark blue pencil in the darkest areas, using a fairly hard pressure and lighter pressure as you move further away.
- Apply the mid-tone - Apply your main the same way you did the shadow - same areas and same pressure.
- Apply the main colour - Apply the main colour throughout - hard pressure in the shadows, average in the main areas and highlight areas.
- Re-apply any colours that look weakened - Starting from darkest to lightest, re-apply the colours using average to hard pressure.
- Blend with base colour - Removes patchiness and establishes the colour of your highlight which should be your main colour with hints of the base.
3 Likes
Summary - Do’s and Dont’s
Let’s briefly summarise with some do’s and don’ts:
Do
- Blend with a white pencil for pale and light skin
- Use black or dark blue for shadows on deep dark skin
- Blend with your base colour for tan, dark and deep dark skin
- Press hard when colouring deep dark skin
- Separate your main colour and mid-tone for tan, dark and deep dark
Don’t
- Blend with a white pencil for tan, dark and deep dark
- Press hard when colouring pale skin
Hope this tutorial helped. If you have any questions feel free to ask 
4 Likes
I’m gonna bump this because it’s an eyemazing recourse!
1 Like
I have a question: how do you colour an alien green?
1 Like
You can actually apply the same technique for human skin tones! 
-
Pick a base tone. In this case you could use yellow for a warm green or light blue for a cold green.
-
Pick a midtone, so “regular” green pencil
-
For the shading, you could use blue or a dark green. You could also use red to make the shadows browner and make the alien have warm undertones
-
Use yellow or light blue to blend
3 Likes
Interesting…  I might give these tutorials a go if I get a good set of pencils for Xmas!
I really want some noice pencils where I have like 4 of the same colour, but in different shades
1 Like