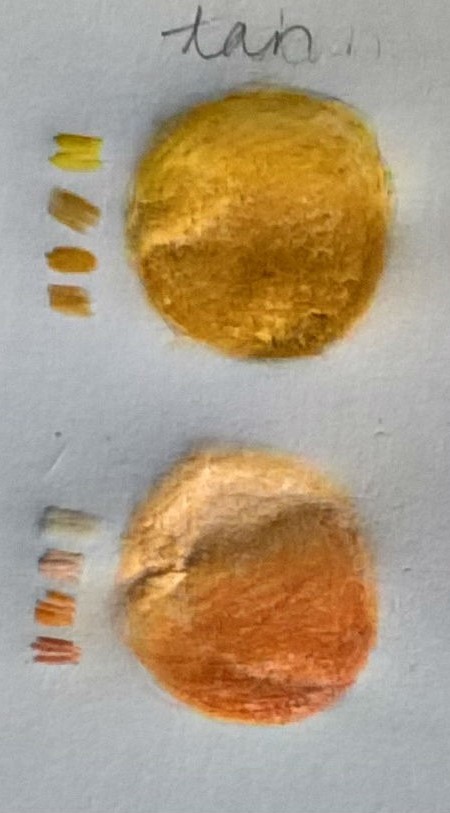
6. Tan Skin Tones
My two tan skin tones are ochre/gold and copper:
This is where the technique changes from now on:
- Start with the dark colours - The desired outcome is a darker skin tone, so pressing harder with the pencil is now a priority
- Blend with the base colour - White pencil will make the skin appear washed out or worse, ashy, so a darker and more pigmented blend colour would help to cover up patchiness whilst still maintaining the overall colour.
- Differentiate your main colour and mid-tone - Have a main colour e.g. ochre and mid-tone e.g. gold ochre - the differences in mid-tone are slightly more visible in darker skin.
I use 4 pencils - a colour as a base and blend, the main colour, a colour with a different shade to the main acting as a mid-tone and a shading colour.
- Apply your base colour - This still needs to be done however for a darker skin tone, use a darker version of the bases we used before, such as ochre, lilac, green, orange or salmon pink - still press lightly for this step.
- Apply your shadow - Shade using average pencil pressure, pressing lighter closer to where the main colour or mid-tone would be.
- Apply your mid-tone and main colour - Using the same technique as step 2, apply your mid-tone and main colour.
- Re-apply any colours that look weakened - Starting from darkest to lightest, re-apply the colours using light pressure to average pressure.
- Blend with base colour - This will establish the colour of your highlight and remove patchiness.